The moment is one of pure excitement in any product development journey. After countless hours of design, prototyping, and refinement, your custom mold-the very tool that will bring your product to life by the thousands-is finally complete and approved. The path to market is clear. You contact your manufacturing partner to schedule the first pilot run, perhaps a modest order of 300 units to test the waters and supply your initial distributors.
And then you encounter a term that can be both confusing and frustrating: MOQ (Minimum Order Quantity). You’re informed that the minimum production run is not 300 pieces, but perhaps 2,000, 3,000, or even more.
The immediate reaction is completely understandable. We’ve heard the question many times at IDMockup:
“Wait, I’ve already paid tens of thousands of dollars for the rapid tooling. It’s my tool. Why can’t you just put it in the machine and run the 300 parts I need? Why is there such a high minimum?”
This is not an arbitrary rule or a tactic to force larger orders. The MOQ is a fundamental economic principle rooted in the significant, unavoidable, and recurring “setup costs” that are required for every single production run. It is the mechanism that makes the incredibly low per-part price of injection molding possible in the first place.
At IDMockup, we believe that transparent partnerships are built on shared knowledge. Our goal is to pull back the curtain on the manufacturing floor to explain the hidden iceberg of costs that makes MOQ a necessity for both the manufacturer and the client. This guide will deconstruct the entire process, revealing why setting up a production line is a complex and costly endeavor, and how the MOQ is simply the break-even point where high-efficiency production becomes viable.
The Two Mountains of Cost: Tooling NRE vs. Production Run Setup
To understand MOQ, it is absolutely critical to distinguish between the two separate, major costs involved in injection molding. Many clients understandably assume that once the mold is paid for, the major investment is over. In reality, paying for the mold is just climbing the first of two mountains.
The First Mountain: The Tooling (NRE Cost)
This is the cost of the mold itself, whether it’s an aluminum mold for our Rapid Tooling service or a hardened steel mold for full-scale production. This is a Non-Recurring Engineering (NRE) cost. You pay it once to create the physical asset-the tool. Think of this as paying a publisher to design, edit, and create the master printing plates for a book. It’s a significant, one-time investment to create the means of replication. Once you’ve paid for it, you own the “printing plates.”
The Second Mountain: The Production Setup Cost
This is the cost that must be paid every single time you want to start a new production run. This is the cost of getting the factory ready to print your book. You have to recall the printing plates from the archive, set up the massive printing press, calibrate the ink, run test pages, and get everything perfectly aligned. This setup process has a significant cost in terms of skilled labor and machine time, and that cost is the same whether you decide to print 100 books or 10,000 books.
In injection molding, this recurring “setup cost” is substantial. The MOQ exists solely to amortize this second mountain of cost over a large enough number of parts to make the production run economically viable.
Deconstructing the Setup Cost: What Happens Before the First Perfect Part is Made?
Let’s walk through the meticulous, time-consuming, and resource-intensive steps that make up the setup cost for every injection molding run. This is the hidden work that the MOQ is designed to cover.
Step 1: The Art of the Mold Set (Known as “架模” — Jià Mó)
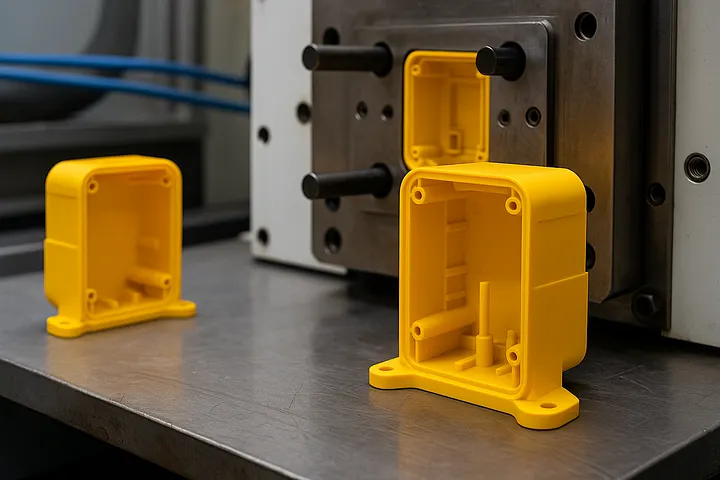
This is far more complex than simply plugging in a new device. An injection mold is a multi-ton piece of precision-engineered steel that must be integrated into a machine of even greater size and complexity.
Retrieval and Preparation: The mold, which can weigh from a few hundred kilograms to several tons, must be carefully retrieved from its climate-controlled storage location. It is thoroughly inspected, cleaned, and prepared for installation.
Installation: Using an overhead crane and the expertise of a highly skilled mold-setting technician, the tool is hoisted into the massive injection molding press. This is a dangerous and delicate operation. The two halves of the mold (the cavity and the core) must be installed with microscopic precision.
Alignment and Clamping: The technician then spends hours meticulously aligning and clamping the mold. This involves bolting the massive steel plates into the machine’s platens and ensuring they meet perfectly. A misalignment of even a fraction of a millimeter could cause catastrophic damage to the tool when hundreds of tons of clamping force are applied.
Connecting Services: Once secured, a complex network of hoses and sensors must be connected. This includes cooling lines that circulate water or oil to control the mold’s temperature (critical for part quality and cycle time), hydraulic lines for any moving slides or cores, and any sensors within the tool.
This entire process is a highly skilled craft that can take anywhere from three to eight hours, all performed by an experienced (and therefore highly-paid) technician. This is a direct labor and machine-downtime cost that occurs before a single gram of plastic is injected.
Step 2: The Science of Material Preparation
Plastic pellets cannot simply be dumped from a bag into the machine. They require precise preparation to meet quality standards.
Drying: Most engineering-grade plastics (like PC, Nylon, and ABS) are hygroscopic, meaning they absorb moisture from the air. If this moisture is not removed, it will turn to steam during the high-heat injection process, causing cosmetic defects (splay, silver streaks) and, more critically, making the final part brittle and structurally weak. To prevent this, the raw pellets must be dried in industrial ovens for several hours (often 4–6 hours) at a very specific temperature.
Color Matching and Mixing: If your part requires a custom color, virgin plastic pellets must be precisely blended with a color concentrate or pigment using an industrial mixer. This ensures that every part in the run has the exact same color.
These material preparation steps require equipment, energy, and time, adding to the fixed setup cost.
Step 3: The Purge — The Necessary and Expensive Waste
The barrel of the injection molding machine, where the plastic is melted, still contains material from the previous production run. This could be a completely different type of plastic, or at the very least, a different color.
To ensure the absolute purity of your part, the barrel must be completely cleaned out or “purged.” This involves heating the barrel and injecting large quantities of your new material through the system until all traces of the old material have been flushed out. This process can consume several kilograms of perfectly good raw material, which is then discarded as waste. This purge material is a direct, unavoidable material cost that is incurred before even the first test part can be made.
Step 4: Dialing It In — The Process of Stabilization and Quality Control
Even with the mold set and the material prepared, the machine is not ready to produce parts that meet specification. The process must be meticulously “dialed in.”
Parameter Programming: The technician programs dozens of variables into the machine’s controller: multiple stages of injection speed and pressure, temperature profiles across several zones of the barrel, cooling time, clamping tonnage, and more. This initial setup is based on experience, but it always requires fine-tuning.
First Article Inspection (FAI): The first 10, 20, or even 50+ “shots” (cycles) are for trial and error. The technician produces a few parts and immediately takes them to the quality control lab. There, they are inspected for cosmetic defects and their critical dimensions are measured using precision calipers, gauges, and often a Coordinate Measuring Machine (CMM).
Iteration: Based on the QC report, the technician makes minute adjustments to the process parameters. Perhaps the holding pressure is increased slightly to prevent sink marks, or the cooling time is extended to correct a minor warp. This cycle of “shoot, measure, adjust” is repeated until the process is stable and the parts are consistently being produced perfectly within the specified tolerances.
All of the material, machine time, and labor used during this stabilization phase-which can take several hours-is a fixed cost. The dozens of parts produced during this time are almost always considered scrap.
The Unforgiving Math of Amortization: Why the MOQ is Necessary
Now that we understand the significant fixed costs involved in setting up a single production run, the logic of the MOQ becomes crystal clear through simple math.
Let’s use a hypothetical but realistic example:
- Total Fixed Setup Cost (Mold Set Labor + Material Prep + Purge Material + Stabilization Time & Scrap): $1,500
- Per-Part Marginal Cost (the actual cost of the plastic and electricity for one part): $0.20
- Price Quoted to Client per part: $1.00
- Gross Profit Per Part (to cover overhead, administration, and profit): $1.00 — $0.20 = $0.80
To simply cover the $1,500 setup cost, the factory needs to produce and sell a certain number of parts. This is the break-even point:
Break-Even Volume = Total Fixed Setup Cost / Gross Profit Per PartBreak-Even Volume = $1,500 / $0.80 per part = 1,875 parts
This calculation reveals the core truth. In this scenario, the factory must produce 1,875 parts just to pay for the cost of setting up the job. The Minimum Order Quantity (MOQ) will therefore be set at or slightly above this number (e.g., 2,000 units) to make the production run viable.
If we were to run only the 300 parts the client initially requested, the financial result would be: (300 parts * $0.80 profit/part) - $1,500 setup cost = $240 - $1,500 = -$1,260 (a significant loss)
Conclusion: A Partnership in Planning for Scale
The Minimum Order Quantity is not an arbitrary barrier or a penalty for small orders. It is a direct and transparent reflection of the high, recurring setup costs that are essential to unlocking the incredible efficiency and phenomenally low per-part price of injection molding. It is the economic mechanism that protects the viability of the manufacturing process, ensuring that this powerful technology can be offered to clients at a competitive price.
Understanding this principle is fundamental to smart manufacturing planning. This is why at IDMockup, we believe in partnering with our clients through their entire product lifecycle. We know that not every project is ready for a 2,000-piece run. For quantities that fall below the injection molding MOQ, our other expert services, such as CNC Machining for single units or Vacuum Casting for dozens of parts, are often the more technically appropriate and cost-effective choice.
We see the MOQ not as a roadblock, but as a milestone. When your project’s demand is ready to cross that threshold, it is a sign that you are ready to leverage the true power of mass production and achieve the lowest possible cost per part. Our team of experts is here to help you plan that journey, ensuring that every step you take is the right one for your product’s scale, budget, and vision for the future.